


Featured Post
Mastering Dresser Assembly: Expert Tips for Seamless Furniture Setup
Overview: Your Guide to Assembling Dresser Furniture
Putting together a dresser can feel overwhelming, but it doesn’t have to be. With the right steps and some insider know-how, you can turn a pile of parts into a sturdy, stylish piece of furniture. This article shares practical assembling dresser furniture tips to make the process smooth and stress-free.
Why Preparation Makes All the Difference
Before you dive into assembling your dresser, set yourself up for success. Clear a big, well-lit space to work in. Lay down a blanket or cardboard to keep your floor and the dresser’s finish safe. Open the box and check every piece against the parts list. Missing a screw? Damaged wood? Call the manufacturer right away—don’t wait.
Sort the hardware into small cups or a muffin tin. It’s a simple trick that saves you from digging through a mess later. Then, read the manual from start to finish. Knowing what’s coming helps you avoid mix-ups. I’ve learned this the hard way—skipping ahead once left me with a backward frame and an hour of undoing screws!

Tools You’ll Wish You Had Sooner
Most dressers come with a tiny hex key, but a few extra tools can save time and effort. Here’s my go-to list:
- Electric screwdriver: Tightens screws fast without tiring your hand. Get one with adjustable settings to avoid overdoing it.
- Rubber mallet: Gently taps pieces together without scratches.
- Level: Keeps everything straight so drawers slide right.
- Measuring tape: Checks fit if something looks off.
I used to muscle through with just the hex key, but an electric screwdriver cut my assembly time in half. Quality tools protect your furniture too—worth every penny. For more on tool safety, check out this guide from OSHA on using hand and power tools properly.
Step-by-Step: Building Your Dresser Right
Follow these steps for a solid dresser:
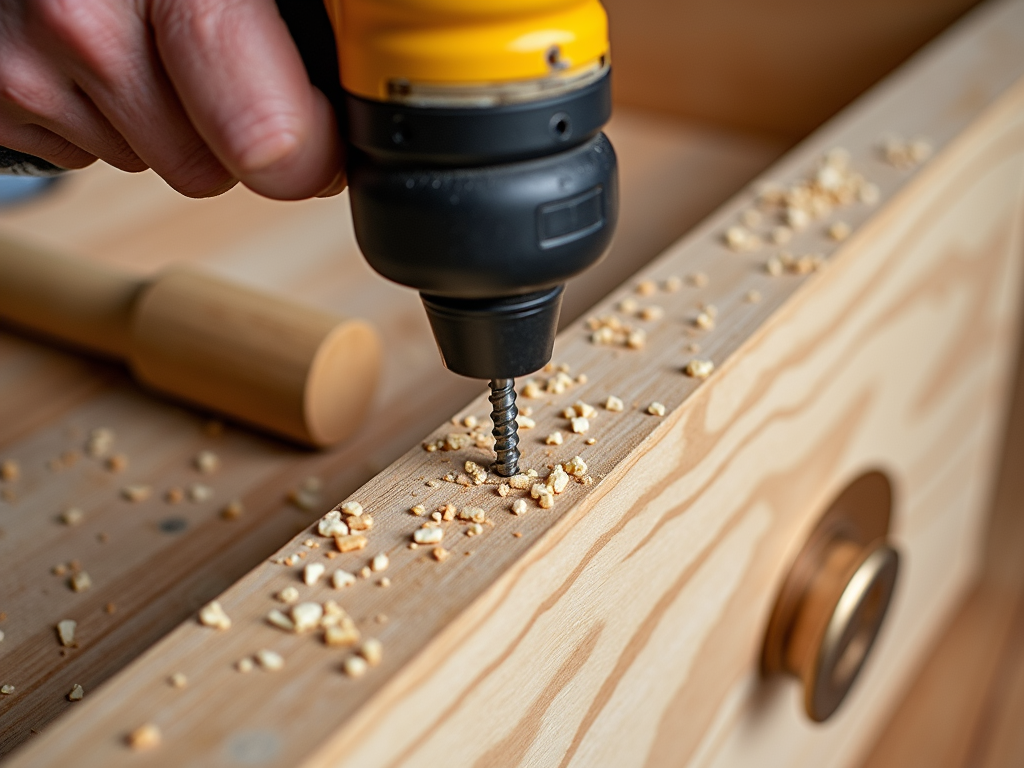
- Frame first: Put the main structure together. Double-check which side is up—parts can trick you.
- Back panel: Nail or screw it on tight. It keeps the dresser steady.
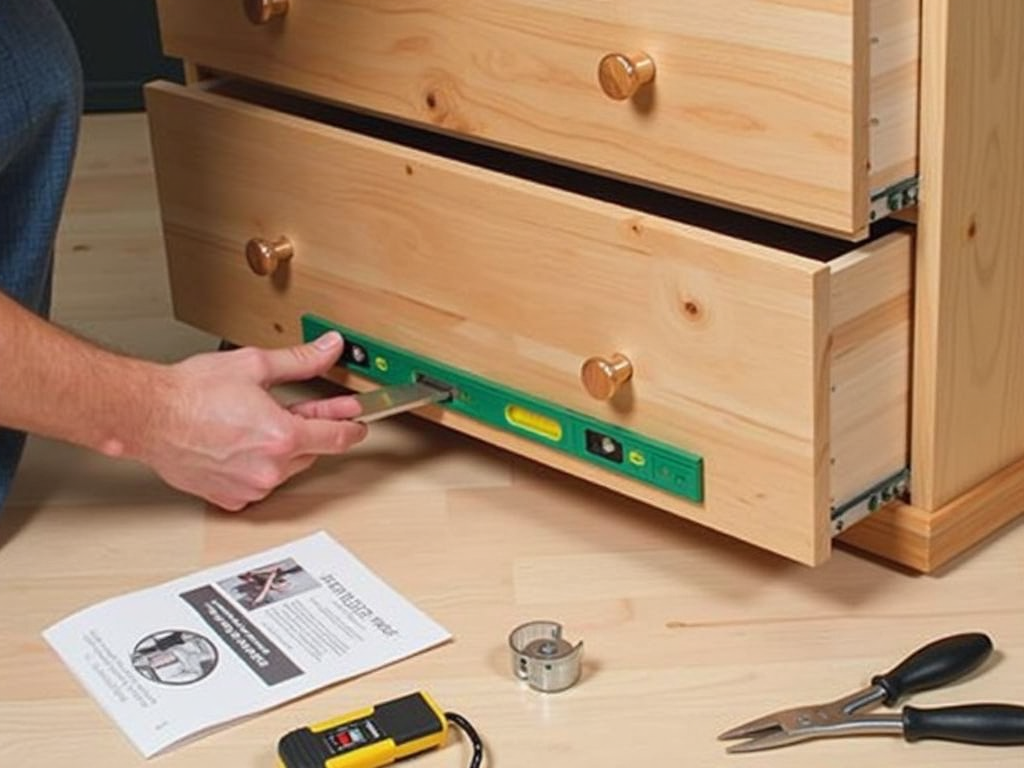
- Drawer slides: Line them up carefully. A level helps here—crooked slides mean sticky drawers.
- Drawers: Build each one square. Test the fit as you go.
- Handles: Add knobs or pulls last. Measure twice so they’re even.
Keep checking that everything’s level as you work. Fixing a wobble now beats wrestling with it later. I once ignored a tilted frame, and my dresser rocked like a boat—lesson learned!
Mistakes to Watch Out For
Even pros mess up sometimes. Here’s how to dodge common traps:
| Problem | Fix |
|---|---|
| Holes don’t match | Loosen nearby screws to shift it. |
| Screws won’t grip | Use a rubber band for traction. |
| Dresser wobbles | Tighten all screws evenly. |
| Drawers stick | Clean tracks, adjust slides. |
Take it slow. Rushing is how I stripped a screw once, turning a 30-minute job into a two-hour headache. The University of Minnesota’s DIY site has great advice on fixing furniture assembly hiccups.
Pro Tricks for a Polished Look
Want your dresser to feel custom-made? Try these:
- Add wood glue: A dab on dowels boosts strength. This woodworking guide from Purdue University explains why glue matters.
- Felt pads: Stick them under legs to save your floor.
- Test drawers: Slide them in and out a few times to catch issues.
- Save spares: Bag extra screws for later fixes.
These extras take minutes but make a huge difference. I started gluing dowels after a drawer fell apart—now my furniture lasts years.
When to Get Help
DIY is great, but some dressers need a pro. Call one if:
- The design has tricky parts like built-in mirrors.
- It’s a pricey or old piece you don’t want to risk.
- You’re short on time.
Paying for help saved me once with a fancy dresser I couldn’t crack. Sometimes it’s smarter to let an expert handle it.

Wrapping Up: Your Dresser, Done Right
Assembling dresser furniture doesn’t need to be a battle. Prep well, use the right tools, and take your time—those are the secrets to a dresser you’ll love. These assembling dresser furniture tips come from real trial and error, so you can skip the frustration I didn’t. Build it, enjoy it, and maybe even tackle another furniture project next!