


Featured Post
DIY Woodworking Projects for Beginners: Build Simple Furniture with Confidence
Quick Overview
Dive into DIY woodworking projects for beginners with this hands-on guide. You'll build simple furniture pieces like a shelf and a chair while picking up tips on tools, safety, and a basic furniture care guide for wood finishing. Perfect for anyone ready to turn wood into lasting creations—let's get started!

I remember my first time holding a saw. The wood felt solid in my hands, and I wondered if I'd mess it up. But guess what? You won't. DIY woodworking projects for beginners build skills step by step. Start small, stay patient, and soon you'll craft furniture that lasts.
First things first: gather your tools. You don't need a fancy shop. A basic set works wonders.
Essential Tools for Your First Builds
Here's a simple list to get you equipped:
- Measuring tape: Accuracy starts here.
- Hand saw: For clean cuts without power.
- Claw hammer: Drives nails and pulls mistakes.
- Screwdriver set: Flathead and Phillips cover most jobs.
- Clamps: Hold pieces steady while glue dries.
- Sandpaper (various grits): Smooths edges like magic.
- Safety glasses and dust mask: Protect your eyes and lungs.
I grabbed these from a local hardware store for under $50. They handled my early projects just fine.
Safety comes next. Always wear your gear. Work in a clear space, and keep a fire extinguisher nearby—wood dust can spark. For more on beginner basics, check out the Kansas 4-H Wood Science Leader Guide from Kansas State University, which covers measuring, cutting, and safe tool use in detail.
Now, pick your wood. Pine is forgiving and cheap. It's soft, so it cuts easy but dents if you're rough. For sturdier furniture, try oak later on.
Understanding wood types helps too. The USDA Forest Service Wood Handbook explains properties like strength and grain—key for choosing right. I learned the hard way: mismatched wood warps your chair legs!
Project 1: Build a Simple Wall Shelf
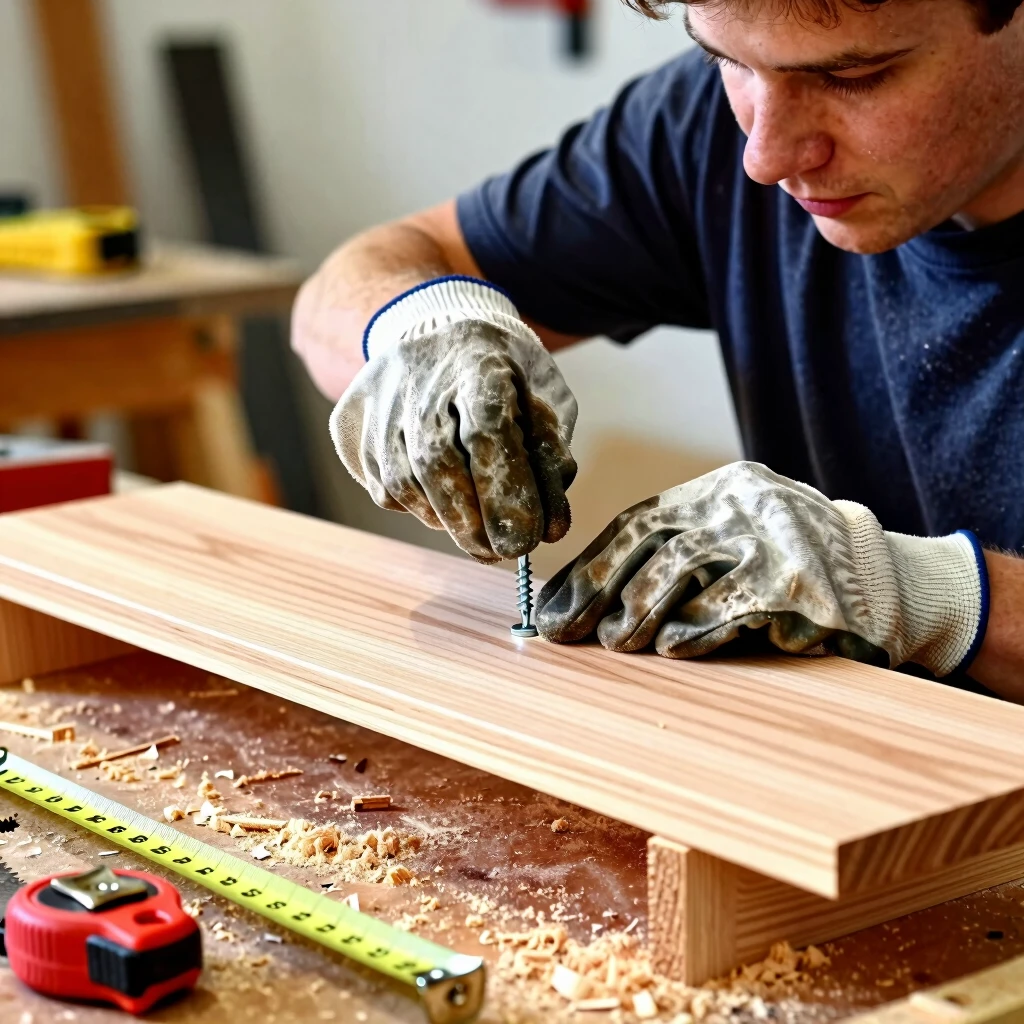
Let's jump in with a wall shelf. It's flat, straightforward, and holds books or plants. This project took me two hours on a lazy Saturday.
Materials Needed: - One 1x8 pine board (3 feet long) - Wood screws (1.5-inch) - Wall anchors if needed
Steps: 1. Measure and mark your board at 12-inch intervals for brackets. 2. Cut two 6-inch support brackets using your hand saw. Keep lines straight—practice on scrap first. 3. Sand all edges smooth. Start with 80-grit, finish with 220. 4. Attach brackets to the shelf underside with screws. Pre-drill holes to avoid splits. 5. Mount to the wall: Find studs with a finder, or use anchors.
Hang it up, and admire. I put mine in the kitchen for spices. It holds steady and looks custom.
That shelf sparked my love for building furniture. Next up: something to sit on. A basic stool or chair frame teaches joints and balance.
Project 2: Craft a Simple Wooden Stool (or Chair Base)
Stools are beginner-friendly chairs. Skip upholstery for now—focus on legs and seat.
Materials: - Four 2x2 pine legs (18 inches each) - One 1x12 seat board (14x14 inches) - Wood glue and screws
Steps: 1. Cut legs to length. Angle the bottom ends at 5 degrees for stability—use a miter box if you have one. 2. Mark leg positions on the seat: 2 inches from edges, centered. 3. Drill pilot holes. Apply glue, then screw legs in place. Clamp overnight. 4. Sand everything. Round sharp corners for comfort. 5. Test: Sit on it. Wobbly? Tighten screws.
My first stool wobbled like a newborn deer. A few adjustments fixed it. Now it graces my porch, holding coffee mugs.
Once built, care keeps your furniture shining. Enter the furniture care guide for wood finishing. Finishes protect against scratches, moisture, and time.
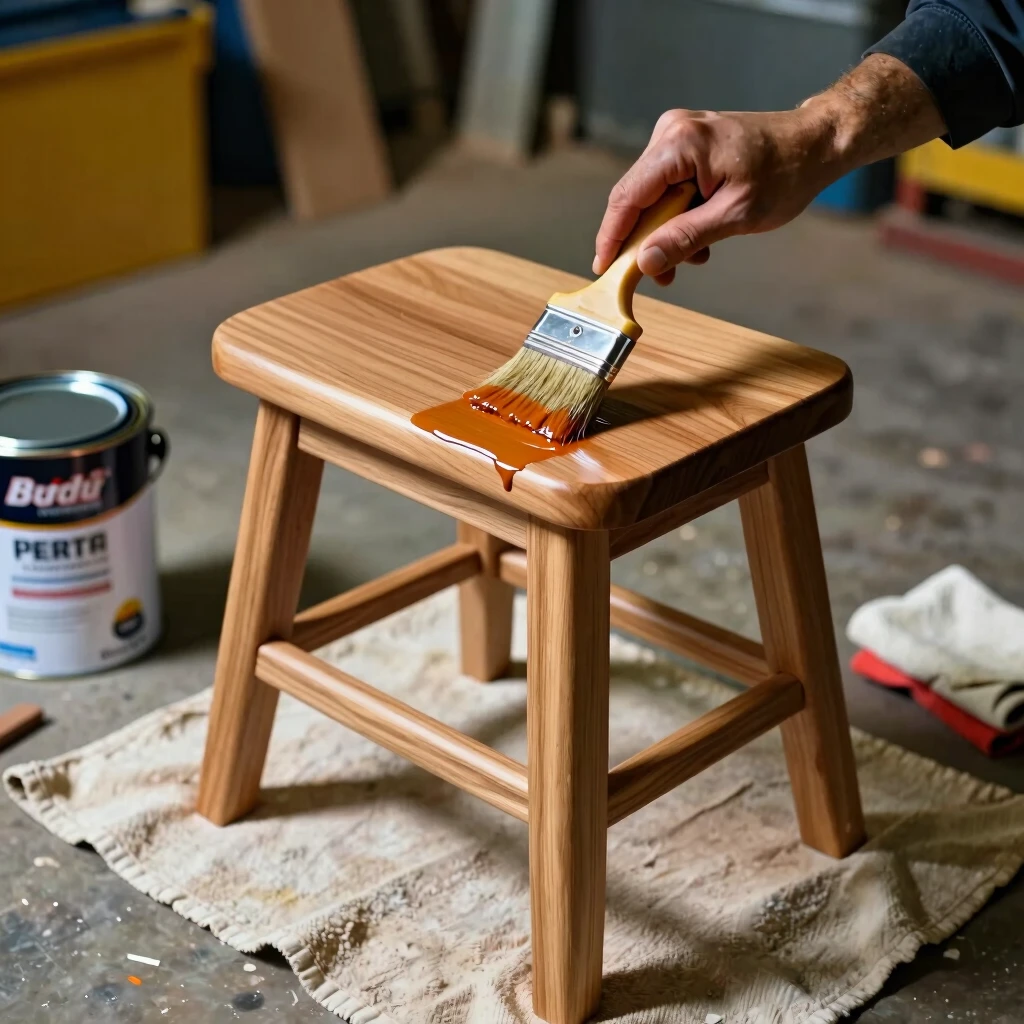
Your Furniture Care Guide for Wood Finishing
Finishing isn't fancy—it's practical. Start clean: Wipe dust away.
Choose your finish: - Oil (like tung or linseed): Soaks in, natural feel. Great for tables. - Polyurethane: Tough topcoat for chairs. Wipe-on for ease. - Wax: Quick polish for shelves.
Application Tips: 1. Sand to 220-grit. Direction follows grain. 2. Apply thin coats. Let dry 24 hours between. 3. Buff lightly after last coat.
For deeper dives, see the Wood Finishing & Refinishing guide from Utah State University. It breaks down methods for newbies and pros alike.
I skipped finishing on my first shelf—big mistake. It scratched fast. Now, I finish everything. Your pieces deserve that care.
Beyond shelves and stools, try these quick wins:
| Project | Time | Skill Boost |
|---|---|---|
| Picture Frame | 1 hour | Precise cuts |
| Cutting Board | 2 hours | Food-safe finish |
| Plant Stand | 3 hours | Basic assembly |
Each builds confidence. I made a frame for family photos—gifts that warm hearts.
Woodworking teaches patience. One cut goes wrong? Scrap it and laugh. Over time, your hands steady, and ideas flow. I've built a whole room of furniture this way—each piece a story.
Common pitfalls? Rushing measurements. Double-check always. And ventilate: Finishes fume.
For joints, butt them simple at first. Later, explore dovetails.
Expand your kit gradually. Add a drill? Game-changer for chairs. But start manual—feels the wood's soul.
Share your builds online. Communities cheer you on. My first post got tips that saved my next project.
Wrapping It Up
DIY woodworking projects for beginners open a world of creation. From that first shelf to a sturdy chair, you've got the tools and know-how. Follow this furniture care guide for wood finishing, and your furniture will endure. Grab some pine, fire up the saw—your workshop awaits. Happy building!