






Featured Post
Assembling Dresser Furniture Tips: Your Complete Step-by-Step Guide
Assembling dresser furniture can be a rewarding DIY project that saves you money and gives you a personalized piece for your home. With the right assembling dresser furniture tips, even beginners can create a sturdy and stylish dresser. This guide shares practical insights from real experiences to help you succeed every time.

Before you tackle any project, preparation sets the stage for success. Start by creating a flat, spacious area on your floor or a sturdy table. Clear away distractions and protect the surface with cardboard to avoid scratches. Gather all parts, hardware, and tools based on the manual's checklist. This step prevents delays and keeps the process organized.
Many first-time assemblers skip this step and end up frustrated. I learned that lesson the hard way with my first IKEA dresser years ago. Take the time to read the full manual from cover to cover. Note the sequence of steps, identify every part with the labels, and group similar hardware together. Use small containers or a magnetic tray to hold screws and fittings.
Tools make a huge difference in ease and safety. You'll typically need a Phillips screwdriver, Allen key or hex wrench, level, measuring tape, and a hammer for adjustments. Invest in an affordable assembly kit if you don't have everything at home. A mallet with a rubber head protects delicate edges during final tightening. Test-fit any drawer slides early to ensure smooth operation.
Proper organization during assembly is a game-changer. Lay out parts in the exact order the manual describes. For drawers, assemble them separately first. I always attach the drawer slides to the dresser frame before inserting the drawers. This approach lets you verify fit and operation without rushing the main structure.
Frame assembly comes next. Start with the side panels and connect them using the provided screws or bolts. Align everything carefully to ensure the dresser stands level. Use the level after each major connection to check for wobbles. Tighten only finger-tight at first, then make final adjustments once the full frame is complete. This prevents over-tightening and keeps wood from splitting.

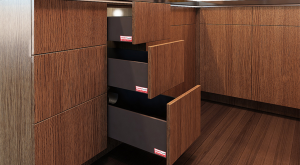
Adding drawers is where many people struggle. Lay the frame flat and attach drawer slides to the sides. Test the drawer fit by sliding it in and out several times. Adjust slides if needed for perfect glide. I discovered that pre-assembling drawers separately saves hours later. Install handles and knobs last using the correct screw lengths shown in the manual to avoid stripping holes.
Attaching the top requires extra care. Place the top panel over the frame and mark screw positions. Drive screws snugly but not excessively tight. A level helps keep the surface perfectly even. Some dressers come with adjustable feet or leveling blocks—use them here to fine-tune stability. Over-tightening screws is a common rookie mistake that damages wood. Always work in small sections and double-check alignment.

Stability checks are essential before using your new dresser. Lift it slightly and rock it side to side to feel for wobbles. Tighten any loose screws. Place the dresser in its intended spot and ensure it sits flat on the floor. For tall units, anchor them to the wall using provided brackets and anchors. Safety first—especially if children or pets are around. A properly assembled dresser not only looks great but lasts for years.
Common pitfalls include skipping steps, mixing up parts, and using the wrong tools. Read the manual twice if needed. Label hardware as you go to avoid confusion. I once wasted an hour because I grabbed the wrong screw size. Take your time and enjoy the satisfaction of a job well done. After assembly, apply wood filler or touch-up paint if any damage occurs during construction.
Personal insights from years of assembling furniture show that patience pays off. Rushing leads to mistakes, but methodical progress builds confidence. Test every joint and drawer before moving on. If your dresser has adjustable shelves, install them after the top is secure. This order keeps everything aligned.
For extra help, consider digital 3D assembly guides that many modern dressers include. These interactive tools let you rotate parts and see exact placements. They save time and reduce errors compared to paper manuals alone. Use them alongside the printed instructions for the best results.
In the end, assembling dresser furniture tips boil down to preparation, organization, patience, and careful tightening. Follow these steps and you'll create a beautiful, functional piece that enhances your space. The sense of accomplishment is unmatched when your dresser stands ready for daily use.