


Featured Post
Chair Upholstery Basics for Beginners
Overview
Reupholstering a chair breathes new life into old furniture. This guide covers Chair Upholstery Basics for Beginners, helping you tackle projects confidently. You'll save money, customize pieces, and enjoy the satisfaction of DIY results. (38 words)

Why Start with Chair Upholstery?
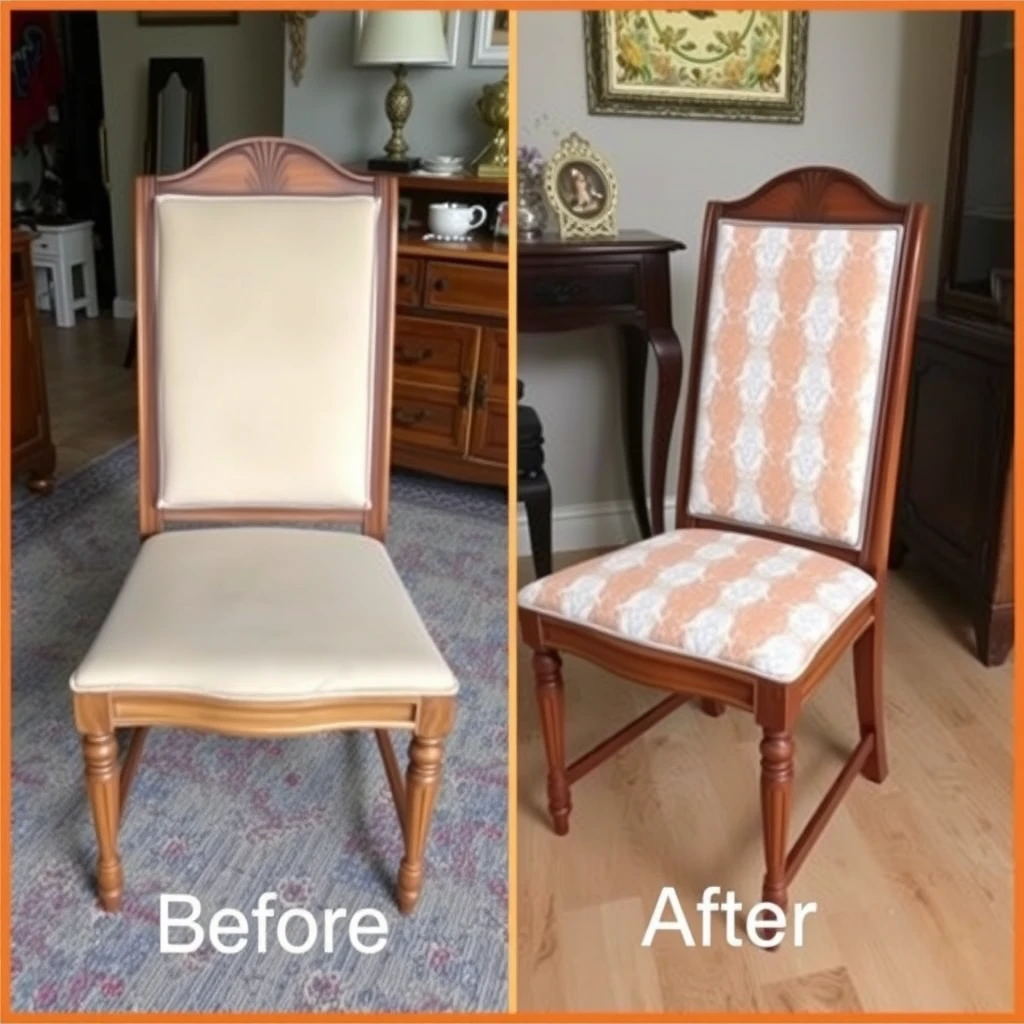
Many people inherit or find worn-out chairs that have great bones but tired fabric. I remember my first project—a thrift store dining chair with sagging seats. After reupholstering it, it became my favorite piece in the room.
Upholstery lets you update furniture to match your style. It's rewarding and more approachable than it seems. Beginners often start with simple chairs because they require fewer materials and skills than sofas.
Reupholstering also ties into broader furniture care. When working on a chair, you often handle wood parts. Following a solid furniture care guide for wood finishing helps protect and restore the frame.
Assessing Your Chair
Before diving in, examine your chair closely.
- Check the frame: Look for loose joints or cracks. Tighten screws or glue wobbly parts.
- Inspect the seat: Is the webbing stretched? Padding flattened?
- Evaluate fabric: Is it just worn, or damaged beyond repair?
For antique chairs, be gentle. As noted in the Smithsonian's guidelines on Furniture Care and Handling, avoid aggressive cleaning that could harm historical value.
If restoring antique furniture, this serves as a Restoring Antique Furniture: A Beginner’s Guide. Document everything with photos—you'll thank yourself later.
Essential Tools and Materials
You don't need a professional shop to start. Here's what beginners use most:
Tools
- Staple gun (manual or pneumatic)
- Tack hammer
- Webbing stretcher
- Sharp scissors
- Pliers and screwdriver for removing old staples
- Measuring tape
Materials
- Upholstery fabric (durable, medium-weight)
- Jute webbing
- Foam or cotton batting
- Staples or tacks
- Dust cover (black fabric for the bottom)
Invest in quality tools—they make the job easier and safer.
Step-by-Step Upholstery Process
Follow these steps for most basic chairs.
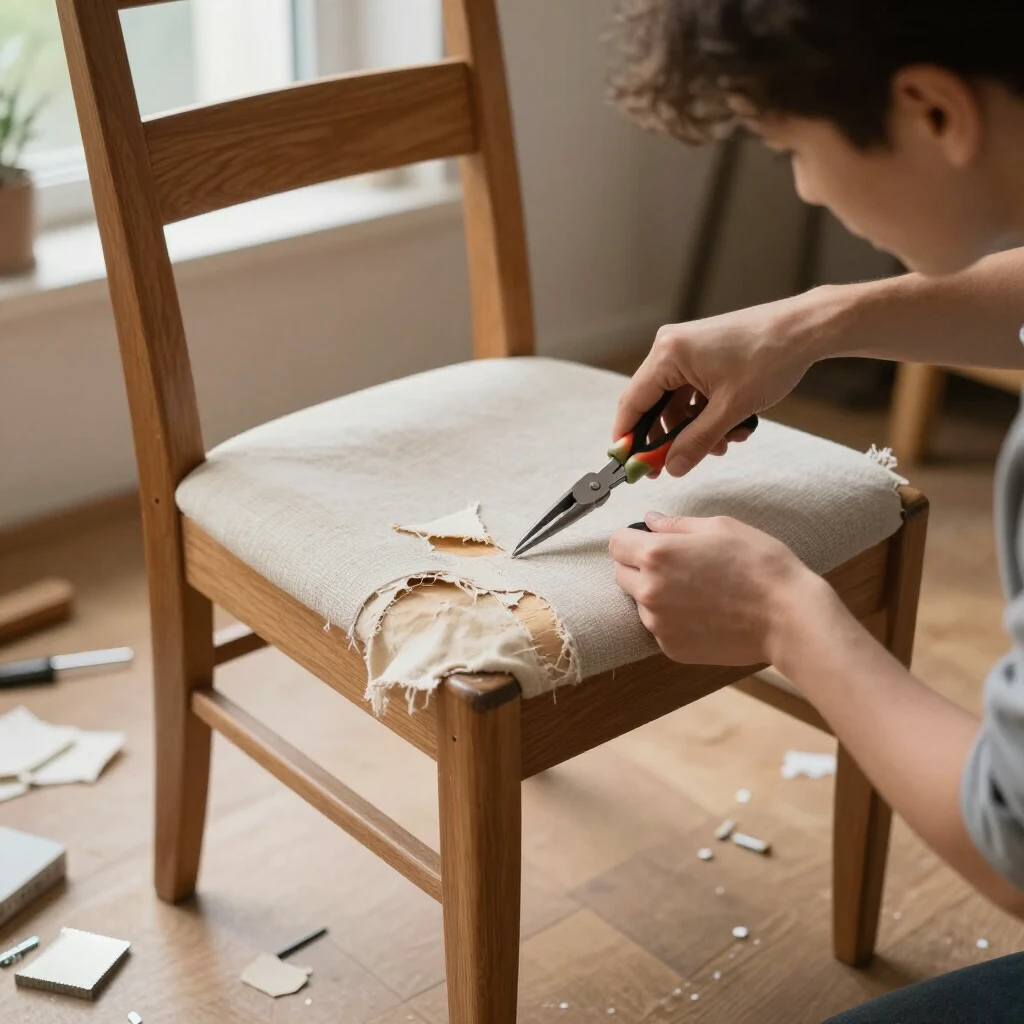
- Remove the seat: Unscrew it from the frame if possible.
- Strip old fabric: Work from the bottom up. Pull staples carefully to avoid damaging wood.
- Inspect and repair foundation: Replace broken webbing. Traditional methods often use jute strips, as described in historical resources like the Smithsonian's Fundamental Construction Techniques for Furniture.
- Add new padding: Layer foam and batting for comfort.
- Cut and attach new fabric: Use old pieces as patterns. Pull taut and staple evenly.
- Finish edges: Add trim or piping if desired.
- Reattach and enjoy.
Always pull fabric straight and tight. Wrinkles ruin the look. For curves, make small relief cuts in the fabric allowance.
| Step | Key Tip | Common Mistake |
|---|---|---|
| Removing old fabric | Take photos of each layer | Rushing and tearing wood |
| Installing webbing | Stretch tightly and fold ends | Loose webbing causing sagging |
| Attaching fabric | Start from center and work out | Uneven pulling leading to puckers |
| Finishing | Cover staples with trim | Leaving raw edges visible |
Choosing the Right Fabric
Pick upholstery-weight material—it holds up better.
- Cotton or linen blends for everyday use
- Velvet for luxury feel
- Patterns hide stains well
Measure carefully: Add extra for pulling and patterns. About 2-4 yards covers most chairs.
Caring for the Wood Frame
While upholstering, clean and protect the wood.
- Dust gently
- Use mild soap for cleaning
- Apply polish or oil for shine
The Smithsonian advises caution with coatings on antiques in their guide to Preserving and Restoring Furniture Coatings.
Common Beginner Mistakes and How to Avoid Them
- Not taking enough photos: Always document disassembly.
- Choosing thin fabric: It tears easily.
- Overstuffing: Leads to lumps.
- Skipping webbing repair: Causes quick sagging.
Learn from trials. My first chair had puckers, but practice fixed that.
Safety Tips
Wear gloves to protect hands from staples. Use eye protection when cutting. Work in a ventilated area if using adhesives.
Advanced Touches for Beginners
Once comfortable, try: - Double welting for edges - Tufting for classic look - Mixing fabrics on front and back
These elevate simple chairs into statement pieces.
Summary
Chair upholstery basics for beginners boil down to preparation, patience, and practice. You can transform any chair—modern or antique—into something beautiful. Combine it with good furniture care, and your pieces will last generations.
Start small, enjoy the process, and soon you'll tackle bigger projects with confidence.