Featured Post
DIY Organizers for Small Cabinets: Maximize Your Space
Small cabinets can be a challenge to organize, but with a little creativity and some DIY skills, you can turn them into efficient storage spaces. In this article, we'll explore different types of DIY organizers that are perfect for small cabinets, share step-by-step guides on how to build them, and provide tips to help you get the most out of your space.

Why Organization Matters
Organization is key to making the most of small spaces. Cluttered cabinets not only look messy but also make it difficult to find what you need. By implementing DIY organizers, you can customize your storage to fit your specific needs and make every inch of your cabinet count. Whether it's in your kitchen, bathroom, or bedroom, well-organized cabinets can save you time and reduce stress.
Types of DIY Organizers for Small Cabinets
There are several types of DIY organizers that work well in small cabinets. Each has its own benefits and can be tailored to suit your specific needs. Here are some popular options:
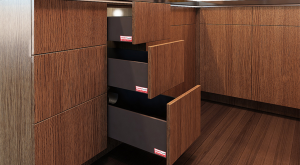
- Pull-out Shelves: Great for accessing items at the back of the cabinet without having to dig through everything in front.
- Door-mounted Racks: Utilize the often-overlooked space on the inside of cabinet doors for spices, cleaning supplies, or small tools.
- Stackable Bins: Maximize vertical space by stacking bins or baskets to store items like snacks, toiletries, or office supplies.
- Custom Dividers: Perfect for keeping items separated and easy to find, especially in drawers or shallow cabinets.

Materials and Tools You'll Need
When it comes to DIY organizers, the materials you choose can make a big difference. Here are some common options:
- Wood: Sturdy and versatile, wood is a popular choice for shelves and dividers. You can paint or stain it to match your cabinet's interior.
- Plastic: Lightweight and easy to clean, plastic is ideal for bins and racks, especially in areas prone to moisture like bathrooms.
- Metal: Adds a modern touch and is great for racks or shelves that need to hold heavier items.
You'll also need some basic tools to get started:
- Drill
- Screwdriver
- Measuring tape
- Saw (if cutting materials yourself)
- Level (to ensure everything is straight)
Don't worry if you're not a seasoned DIYer—many of these projects are beginner-friendly and require minimal tools.

Step-by-Step Guide: Building a Pull-out Shelf
Let's dive into one of the most useful DIY organizers for small cabinets: the pull-out shelf. Here's how you can build and install one:
- Measure Your Cabinet: Start by measuring the width, depth, and height of the cabinet interior. This will determine the size of your shelf.
- Cut Your Materials: Using wood or another material of your choice, cut two side pieces, a front piece, a back piece, and a bottom piece to fit your measurements.
- Assemble the Shelf: Attach the side pieces to the front and back pieces using screws or nails, then secure the bottom piece.
- Install Drawer Slides: Attach drawer slides to the sides of your shelf and the inside of the cabinet. Make sure they are level and aligned properly.
- Test the Shelf: Slide the shelf in and out to ensure it moves smoothly. Adjust the slides if necessary.
Once installed, a pull-out shelf can make a world of difference in how you use your cabinet space.

Step-by-Step Guide: Installing a Door-mounted Rack
Another space-saving solution is a door-mounted rack. Here's how to install one:
- Choose Your Rack: You can buy a pre-made rack or make one from wire baskets or small shelves.
- Measure the Door: Measure the inside of your cabinet door to ensure the rack will fit without hitting the shelves inside when the door closes.
- Attach the Rack: Use screws or adhesive hooks to attach the rack to the door. If using screws, pre-drill holes to avoid splitting the wood.
- Organize Your Items: Place lightweight items like spices, cleaning cloths, or small tools in the rack.
This simple addition can free up valuable shelf space inside the cabinet.

Step-by-Step Guide: Making Stackable Bins
Stackable bins are perfect for maximizing vertical space. Here's how to make your own:
- Select Your Bins: Choose bins that are the right size for your cabinet and the items you want to store. Plastic or fabric bins work well.
- Add Dividers (Optional): If you want to separate items within the bins, add dividers made from cardboard or thin wood.
- Stack the Bins: Place the bins on top of each other, ensuring they are stable. You can secure them with Velcro strips if needed.
- Label the Bins: Use labels to identify what's inside each bin, making it easier to find what you need.
Stackable bins are especially useful in pantry cabinets or under-sink storage.

Step-by-Step Guide: Creating Custom Dividers
Custom dividers are ideal for drawers or shallow cabinets. Here's how to make them:
- Measure the Space: Measure the length, width, and height of the area where you want to place the dividers.
- Cut the Dividers: Use thin wood, cardboard, or foam board to cut pieces that will fit snugly into the space.
- Assemble the Dividers: Arrange the pieces to create compartments of the desired size. You can glue them together or use small brackets for added stability.
- Place in the Cabinet: Insert the dividers into the cabinet or drawer, adjusting as needed to ensure a perfect fit.
Custom dividers are perfect for organizing utensils, office supplies, or jewelry.

Tips and Tricks for Successful DIY Organizers
Here are some additional tips to help you get the most out of your DIY projects:
- Measure Twice, Cut Once: Accurate measurements are crucial for ensuring your organizers fit perfectly.
- Choose the Right Materials: Consider the environment—use moisture-resistant materials in bathrooms or kitchens.
- Maximize Vertical Space: Don't forget to use the height of your cabinets. Stackable bins or tiered shelves can help.
- Label Everything: Labels make it easier to find what you need and keep your cabinets organized over time.
- Maintenance: Regularly check your organizers for wear and tear, and make adjustments as needed.
By following these tips, you'll create organizers that are not only functional but also long-lasting.

Comparing DIY Organizer Types
To help you decide which organizer is right for your needs, here's a quick comparison:
| Organizer Type | Pros | Cons |
|---|---|---|
| Pull-out Shelf | Easy access to back items | Requires more installation effort |
| Door-mounted Rack | Utilizes door space | May not hold heavy items |
| Stackable Bins | Maximizes vertical space | Can be tricky to stack stably |
| Custom Dividers | Perfectly fits your items | Time-consuming to make |
Choose the one that best suits your cabinet and the items you need to store.
My Personal Experience with DIY Organizers
I remember the frustration of trying to find a specific spice in my overcrowded kitchen cabinet. Jars were stacked precariously, and I often had to remove half the contents to reach what I needed. That's when I decided to try my hand at DIY organizers. I started with a simple door-mounted rack for my spices, and it was a game-changer. Not only did it free up shelf space, but I could also see all my spices at a glance. Encouraged by that success, I tackled a pull-out shelf for my pots and pans. It took a bit more effort, but the result was worth it. Now, I can easily access everything in my cabinets without the hassle. If I can do it, so can you!

Conclusion
With these DIY organizers, you can transform your small cabinets into efficient, clutter-free spaces. Not only will you save time and frustration, but you'll also feel a sense of accomplishment from completing these projects yourself. Remember, the key to successful organization is customization—tailor your organizers to fit your specific needs and space. So grab your tools, get creative, and start organizing today!


