


Featured Post
Upcycling Old Furniture: A Step-by-Step Guide to Transform Your Nightstand
Overview
Upcycling old furniture is a rewarding way to refresh your home while reducing waste. This guide focuses on transforming a nightstand into a stylish, functional piece. Whether you're a beginner or a seasoned DIYer, our step-by-step process, infused with personal insights, will help you create a unique nightstand that elevates your bedroom.
Why Upcycle a Nightstand?
Upcycling is more than a trend—it's a sustainable choice that saves money and sparks creativity. I remember finding a scratched, wobbly nightstand at a thrift store for $10. Instead of tossing it, I saw potential. With some paint and elbow grease, it became my favorite bedroom piece. Upcycling lets you customize furniture to match your style while keeping it out of landfills. According to the EPA, reusing items like furniture can reduce household waste by up to 30%.
Step 1: Choose the Right Nightstand
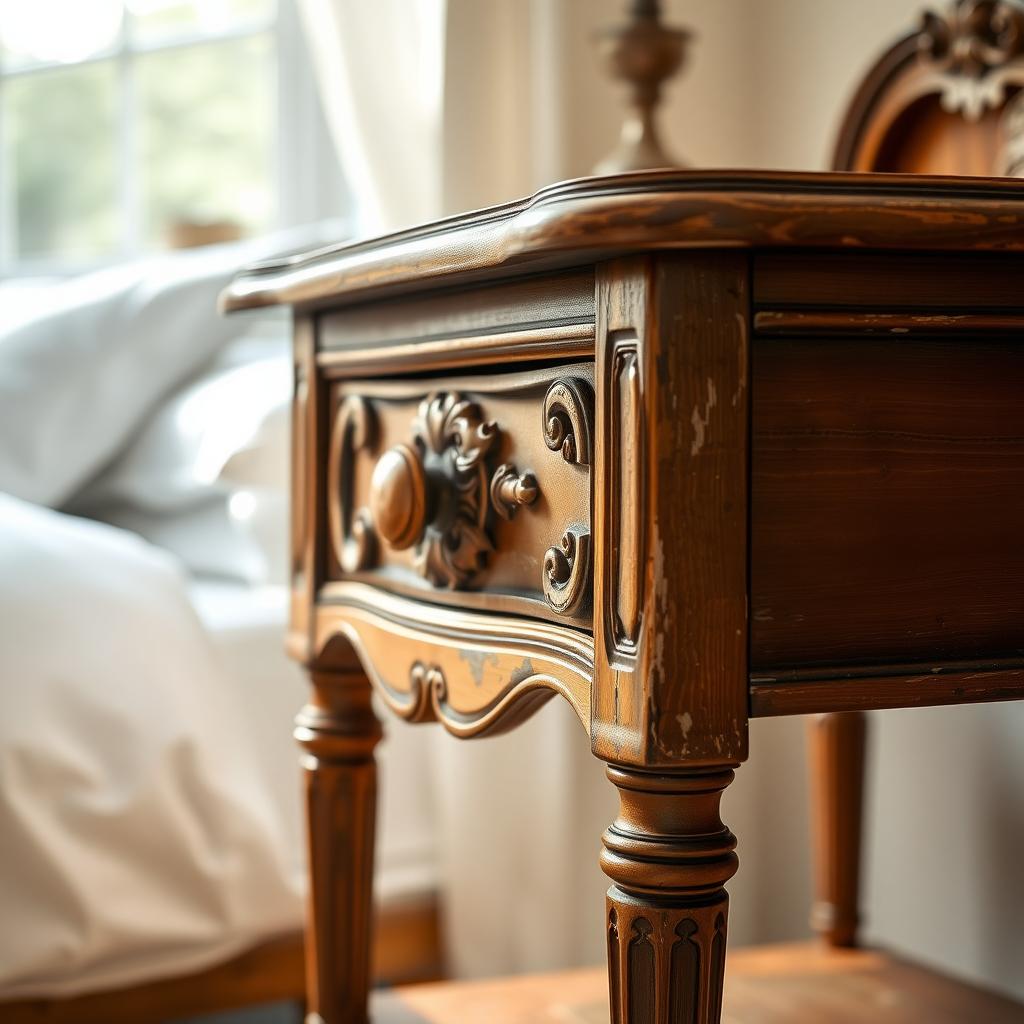
Before diving into a DIY Nightstand Makeover, you need the perfect piece. How to Choose the Perfect Nightstand for Your Bedroom starts with assessing your space and needs. Measure your bedroom to ensure the nightstand fits—aim for a height similar to your mattress (around 24-28 inches). Look for sturdy materials like solid wood, which holds up better than particleboard. Thrift stores, garage sales, or even your attic are great places to find candidates. My tip? Check for unique details like carved edges or vintage hardware that add character.
Step 2: Gather Your Supplies
A successful upcycle starts with preparation. Here’s what you’ll need:
- Sandpaper (80-220 grit) for smoothing surfaces
- Primer and paint (chalk or latex for durability)
- Screwdriver for hardware removal
- Wood filler for cracks or dents
- Brushes and rollers for even application
- Optional: Decorative elements like stencils or new knobs
I learned the hard way to invest in quality paint—cheap brands chip easily. For eco-friendly options, check Green Building Supply for non-toxic paints.
Step 3: Prep the Nightstand
Preparation is key to a professional finish. Start by removing drawers and hardware. Clean the nightstand with a damp cloth and mild soap to remove dust and grime. Next, sand the surface to remove old paint or varnish. I once skipped sanding, thinking primer would cover it all—big mistake. The finish peeled within months. Use 80-grit sandpaper for heavy stripping, then 220-grit for a smooth base. Fill any cracks with wood filler and let it dry completely.
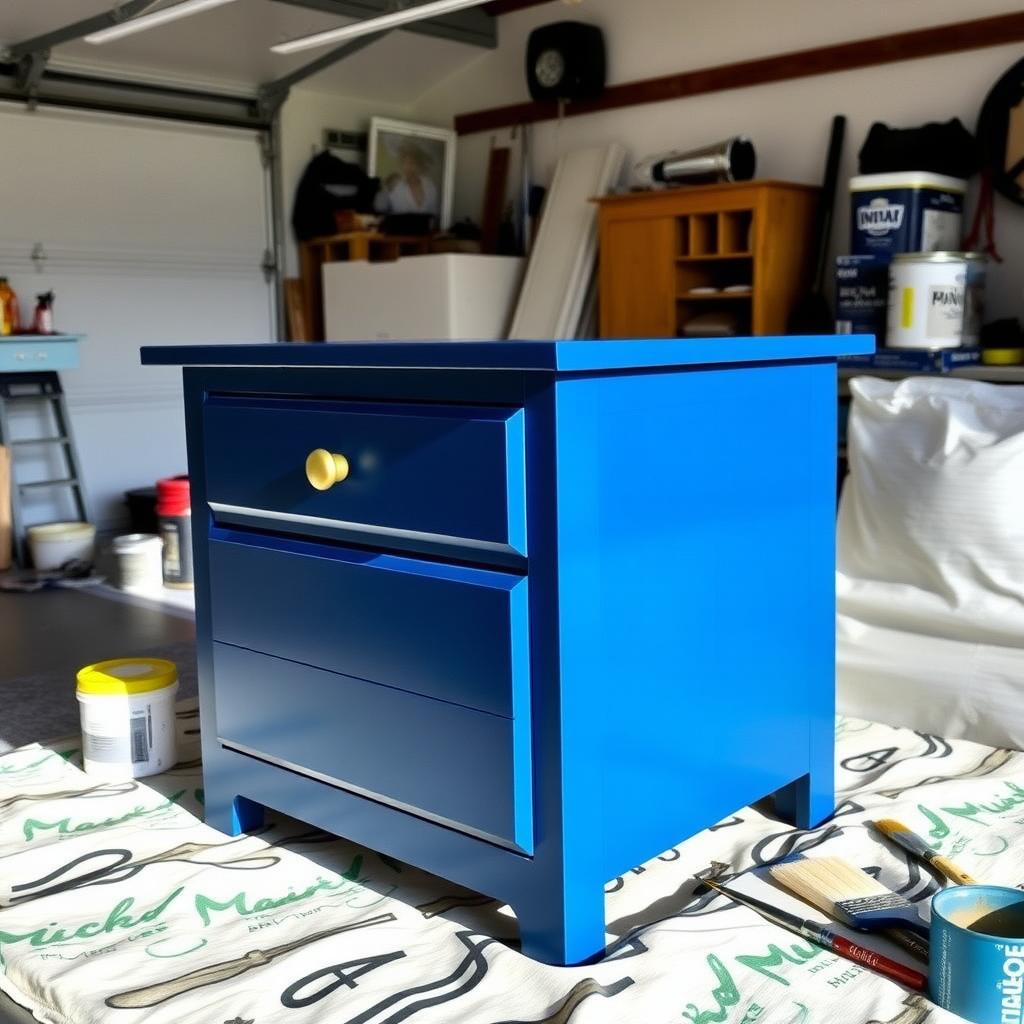
Step 4: Prime and Paint
Apply a thin layer of primer to help paint adhere. I prefer a brush for corners and a roller for flat surfaces to avoid streaks. Once the primer dries (about 4 hours), apply your chosen paint color. For a DIY Nightstand Makeover, bold colors like navy or sage green add personality, while neutrals like white or gray keep it timeless. Two coats usually do the trick. Let each coat dry fully—patience pays off here.
Step 5: Add Creative Touches
This is where Easy DIY Nightstand Upgrades shine. Consider these ideas:
| Upgrade Idea | Description | Estimated Cost |
|---|---|---|
| New Hardware | Swap old knobs for modern or vintage ones | $5-15 |
| Stenciling | Add patterns with stencils for a custom look | $10-20 |
| Decoupage | Apply decorative paper for a boho vibe | $5-10 |
| Two-Tone Paint | Paint drawers a different color for contrast | $0 (use leftover paint) |
I once added gold leaf to drawer edges for a luxe look—it cost under $10 and got endless compliments. Experiment with what fits your style.
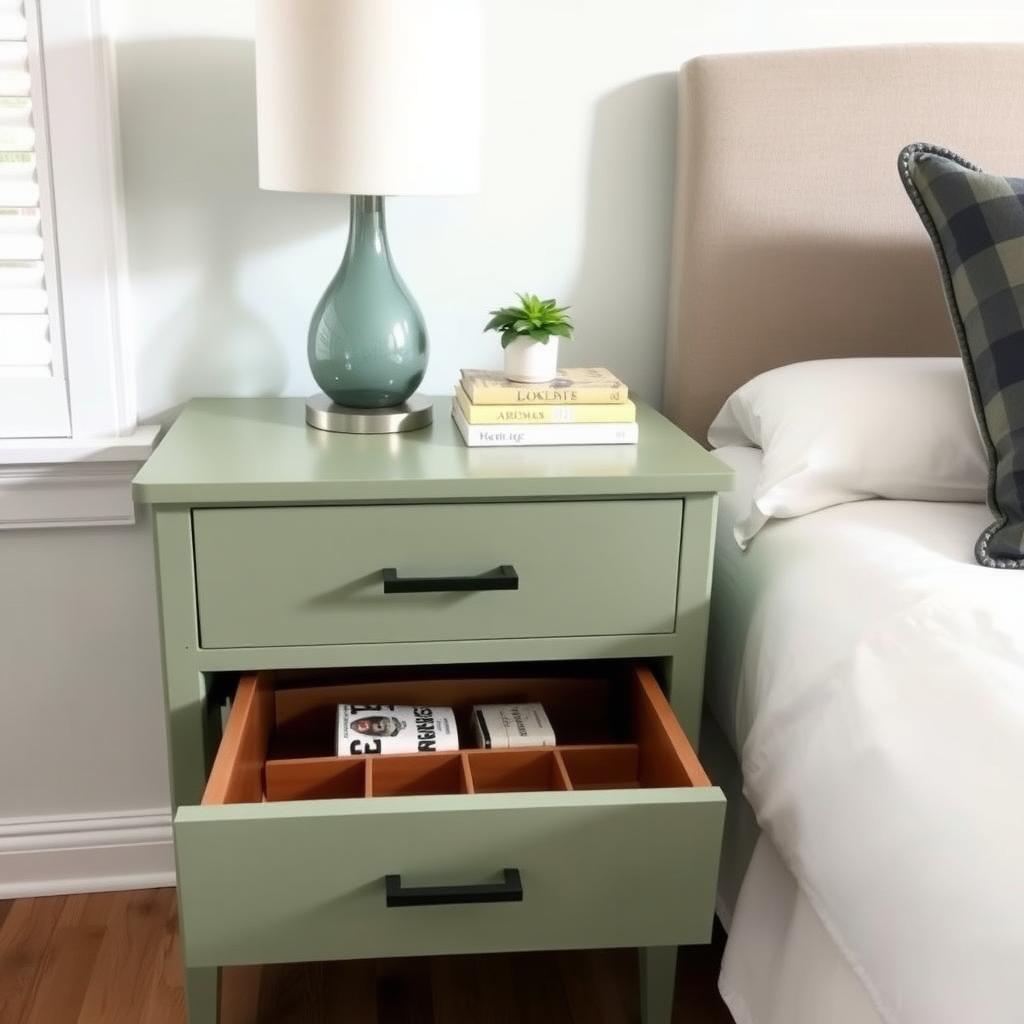
Step 6: Organize Like a Pro
A nightstand isn’t just decor—it’s functional. Nightstand organization tips can maximize its utility. Use drawer dividers for small items like chargers or glasses. Add a tray on top for jewelry or books. I keep a small basket inside for bedtime essentials like lotion and earplugs. For inspiration, the Container Store offers clever storage solutions. Keep only what you need to avoid clutter—less is more.
Step 7: Seal and Protect
To ensure your nightstand lasts, seal it with a clear polyurethane topcoat. Water-based sealants are low-odor and dry quickly. Apply two thin layers, sanding lightly between coats for a smooth finish. This step saved my nightstand from water rings when I spilled my coffee one morning. A durable finish keeps your hard work looking fresh for years.
Troubleshooting Common Issues
Upcycling isn’t always smooth sailing. If paint bubbles, you likely didn’t sand enough—strip it and start over. Uneven finishes? Thin your paint with water (about 10%) for smoother application. For wobbly legs, tighten screws or add felt pads. I once had a drawer that stuck; a bit of soap on the tracks fixed it instantly. The University of Minnesota Extension has great resources on furniture repair for trickier fixes.
The Joy of Upcycling
Upcycling is about more than furniture—it’s about creativity and sustainability. My thrift store nightstand now sits proudly in my bedroom, a reminder that old things can find new life. Each scratch I sanded and each color I chose tells a story. You don’t need fancy tools or skills—just a vision and a bit of effort.
Summary
Upcycling old furniture, like a nightstand, is an accessible way to refresh your home. From choosing the right piece to adding personal touches, this guide walks you through every step. With a few supplies and some creativity, you can create a piece that’s both beautiful and functional. Start small, experiment, and enjoy the process!