


Featured Post
DIY Furniture Projects for Beginners: Build Your Own Stylish Pieces
Overview
Ready to dive into DIY furniture projects but not sure where to start? DIY furniture projects for beginners are a fantastic way to add personal flair to your home while saving money. From simple nightstands to creative storage solutions, this guide walks you through beginner-friendly projects with clear steps and practical tips. Whether you're new to woodworking or just want to refresh your space, these projects are approachable and rewarding.
Why Choose DIY Furniture Projects?
Building your own furniture is more than just a weekend hobby—it’s a chance to create something unique. As someone who started with zero woodworking skills, I remember the thrill of turning a pile of wood into a functional nightstand. DIY projects let you customize designs to fit your style and space, often at a fraction of the cost of store-bought pieces. Plus, they’re a great way to learn new skills and feel accomplished.
According to a study by the Home Improvement Research Institute, 70% of homeowners prefer DIY projects for home upgrades due to cost savings and personalization. With basic tools and a bit of patience, you can craft furniture that’s both practical and stylish.
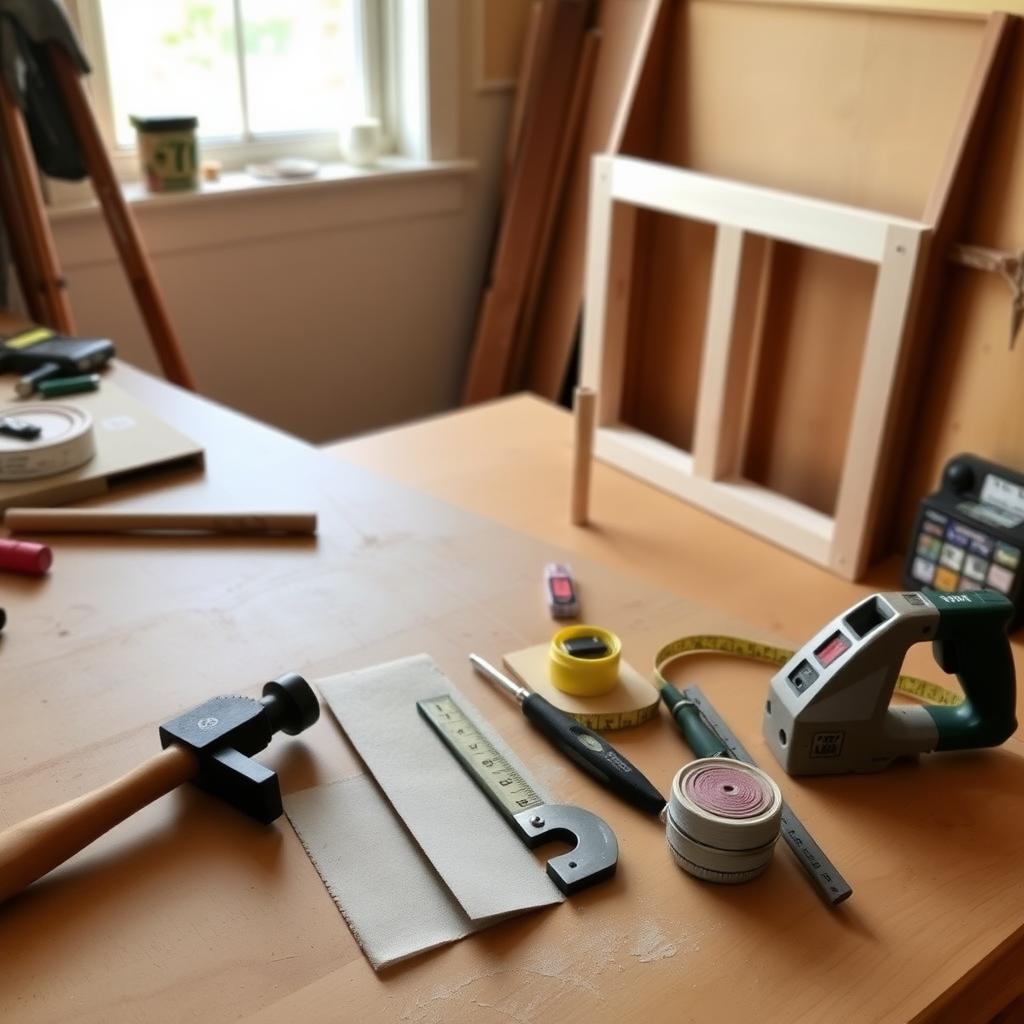
Getting Started: Tools and Materials
Before you jump into DIY furniture projects for beginners, gather the right tools. You don’t need a fancy workshop—a few essentials will do. Here’s what I recommend based on my own projects:
| Tool/Material | Purpose | Estimated Cost |
|---|---|---|
| Hand Saw or Power Drill | Cutting wood and securing joints | $20-$100 |
| Sandpaper (80-120 grit) | Smoothing surfaces | $5-$10 |
| Measuring Tape | Ensuring accurate cuts | $5-$15 |
| Wood Screws/Nails | Joining pieces | $5-$10 |
| Wood (Pine or Plywood) | Main material for furniture | $20-$50 |
Start with affordable, easy-to-work woods like pine. Check your local hardware store or Lowe’s Wood Buying Guide for tips on selecting quality lumber. Always measure twice and cut once to avoid mistakes—I learned this the hard way after ruining a board!
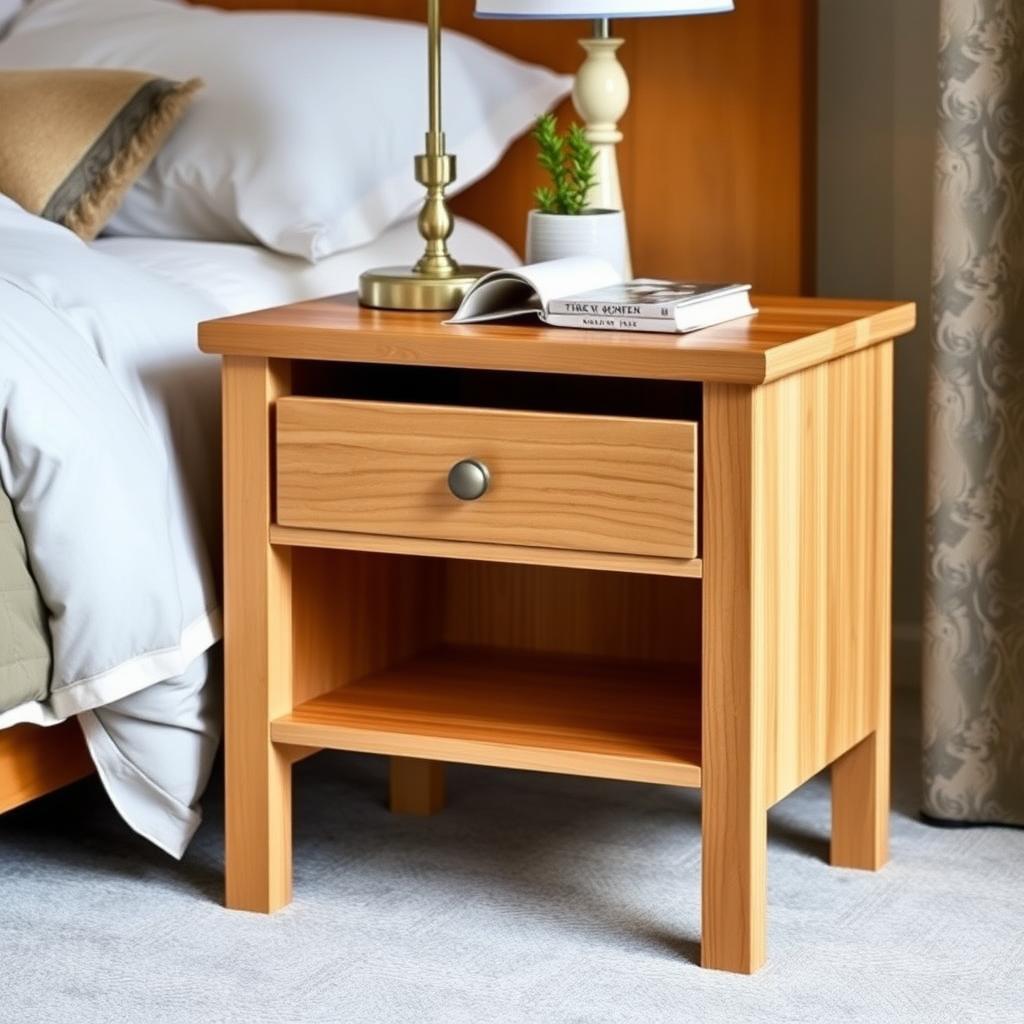
Project 1: Build a Simple Nightstand
A nightstand is a perfect first project. It’s small, functional, and forgiving for beginners. Here’s a step-by-step guide to build a basic 24” x 18” x 24” nightstand:
- Plan Your Design: Sketch a simple box frame with four legs, a top, and one shelf. Use graph paper to visualize dimensions.
- Cut Your Wood: Cut four legs (24” long), two side panels (18” x 16”), a top (24” x 18”), and a shelf (22” x 16”).
- Assemble the Frame: Secure legs to side panels with wood screws. I found using a drill makes this faster.
- Add the Shelf and Top: Attach the shelf halfway up the frame and screw the top in place.
- Sand and Finish: Sand all surfaces smooth, then apply paint or stain. I love a natural wood stain for a rustic look.
This project took me about 4 hours and cost under $40. If you want inspiration, This Old House has a great tutorial for similar builds.
Project 2: Easy DIY Nightstand Upgrades
Already have a nightstand? Give it a refresh with these easy DIY nightstand upgrades. I transformed my old, scratched nightstand into a chic piece with just a weekend’s work. Try these ideas:
- Paint or Stain: A fresh coat of paint can modernize any piece. I used chalk paint for a matte finish—no sanding required!
- Add Hardware: Swap out old knobs for sleek pulls. I found affordable options at my local hardware store.
- Install a Shelf: Add a small shelf for extra storage. This took me 30 minutes and cost $10 for wood.
- Line Drawers: Use peel-and-stick wallpaper for a pop of color inside drawers.
These upgrades are budget-friendly and don’t require advanced skills. For more ideas, check Better Homes & Gardens’ furniture makeover tips.
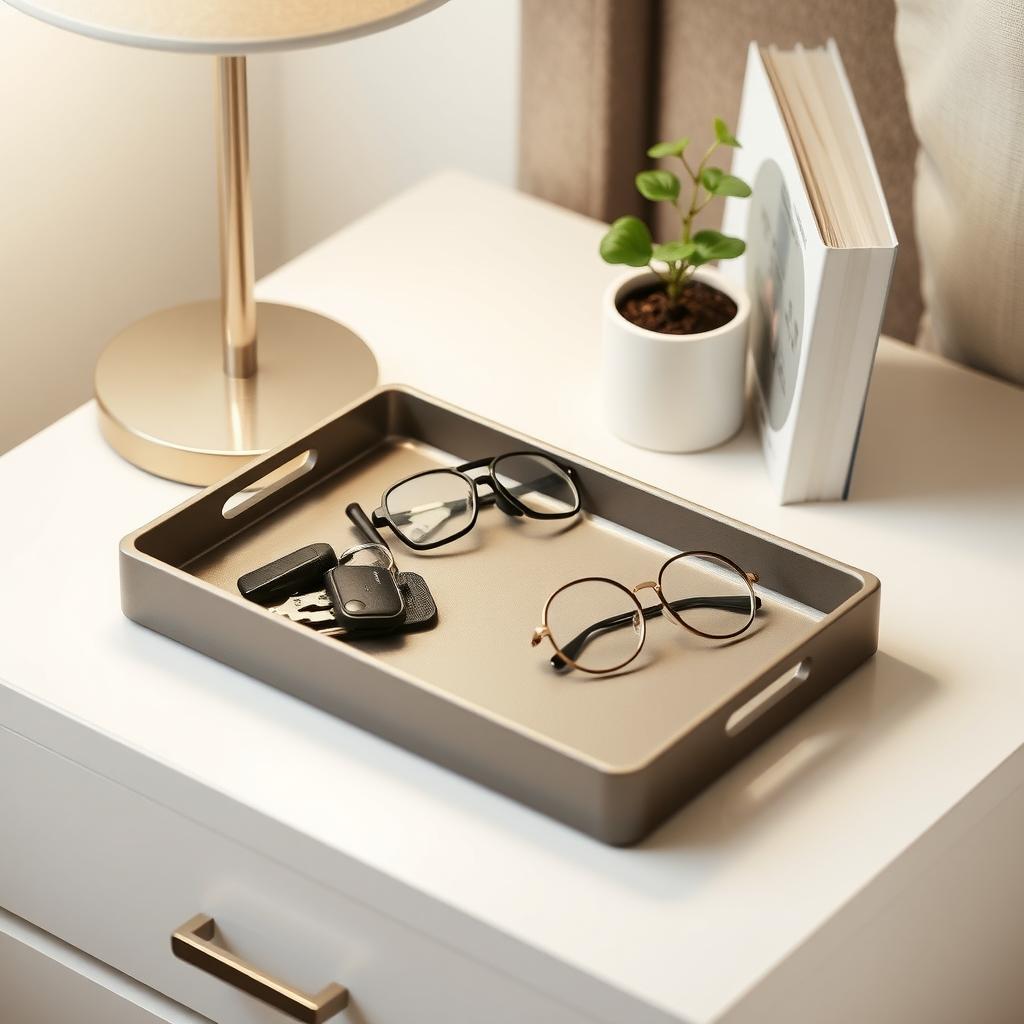
Nightstand Organization Tips
A nightstand isn’t just decor—it’s a functional space. Here are my favorite nightstand organization tips to keep it clutter-free:
- Use Small Trays: Corral items like keys or glasses in a decorative tray.
- Add a Drawer Organizer: I use a $5 plastic divider for chargers and small items.
- Incorporate Baskets: A small basket on the shelf holds books or remotes.
- Limit Items: Stick to essentials like a lamp, phone, and one book to avoid mess.
Keeping things tidy makes your bedroom feel more relaxing. I learned this after my nightstand became a catch-all for junk!
Project 3: Floating Nightstand
Want a modern twist? Build a floating nightstand that mounts to the wall. It’s space-saving and looks sleek. Here’s how I made mine:
- Cut a Box: Use plywood to create a 20” x 12” x 8” open-front box.
- Sand and Paint: Smooth the surfaces and paint in a bold color—I chose navy blue.
- Mount to Wall: Use a French cleat or wall brackets for secure mounting. Check Woodworkers Guild of America for mounting tips.
- Add Finishing Touches: I added a small drawer pull for style.
This project cost about $25 and took 3 hours. It’s perfect for small bedrooms where floor space is tight.
Tips for Success
- Start Small: Don’t tackle a dining table as your first project. Nightstands are manageable and build confidence.
- Watch Tutorials: YouTube is your friend—I watched dozens of videos before starting.
- Safety First: Wear goggles and gloves when cutting or sanding.
- Mistakes Happen: My first nightstand was wobbly, but I fixed it with extra screws. Learn as you go!
Building furniture is about progress, not perfection. Each project teaches you something new.
Summary
DIY furniture projects for beginners are a fun, affordable way to personalize your home. From building a simple nightstand to upgrading an old one or crafting a floating shelf, these projects are perfect for newbies. With basic tools, a bit of creativity, and practical nightstand organization tips, you can create furniture that’s both useful and beautiful. Start small, enjoy the process, and watch your skills grow!